IP Blacklist: How to Handle IP Addresses Being Blacklisted?


Have you ever encountered a sudden drop in website traffic or failed email deliveries? A commonly overlooked reason might be the blacklisting of your IP address. Even if you haven’t engaged in any illegal online activities, this problem can still occur. So, what exactly is a blacklist, how does it affect you, and what can you do about it?
A blacklist is part of a network security system, primarily aimed at preventing threats like ransomware from compromising user safety. Data from Statista indicates that common ransomware infection methods include spam and phishing, which could lead to your email being marked as a risk. However, the blacklist system is not without flaws and can sometimes make errors.
You might find your IP address blacklisted even without any wrongdoing on your part. It could be due to someone else misusing the server IP or simple operational mistakes. Sometimes, just sending emails frequently or forgetting to update email authentications (like DMARC, SPF, and DKIM) can trigger security alerts.
This article will explore various reasons why an IP address can be blacklisted and provide guidance on how to free yourself from this predicament. We will also offer preventative measures to help you avoid such problems in the future.
What is an IP Blacklist?
An IP blacklist is a common cybersecurity measure that records IP addresses that may be involved in nefarious online activities and restricts their access. IP addresses on a blacklist are often associated with spam, hacking, and online scams. Domain Name System Blacklists (DNSBL) are the tools that manage these blacklists by using a set of criteria to decide which IP addresses should be banned.
Email service providers use DNSBLs to filter emails, preventing those from blacklisted IPs from reaching users' inboxes, which is an effective prevention strategy. However, the DNSBL system isn't flawless, and sometimes it might mistakenly mark legitimate IP addresses as spam sources. In such cases, the owner of the IP address can use online blacklist checking tools to detect if their IP has been wrongfully blacklisted and take steps to appeal.
When using DNSBLs, network administrators and users should understand that these blacklists are not static. They are regularly updated to reflect the latest cybersecurity threats and intelligence. At the same time, IP addresses can be delisted when their behavior improves and is no longer associated with malicious activities. Users should remain vigilant to ensure their IP addresses are not blacklisted due to security vulnerabilities or missteps.
Next, let's look at the various types of IP blacklists.
Types of IP Blacklists
IP blacklists fall into two main categories: IP-based and domain-based. Each of these categories contains several subtypes, and the specific classification criteria depend on the methods and goals of the blacklist's creators.
IP-based blacklists involve IP addresses marked due to their notorious reputation. These IPs may be associated with online fraud, malicious attacks, or more serious criminal activities. When an IP's nefarious activity is clear enough, any connection originating from it could be banned.
Domain-based blacklists focus on IP addresses associated with specific domains or URLs. These IPs could be blacklisted if related to phishing, malware distribution, and other harmful behaviors.
Compared to IP-based blacklists, domain-based blacklists have a wider impact as they consider various security issues such as network traffic, user page content, and DNS records when deciding whether to blacklist an IP.
Let's take a look at the subtypes of various IP blacklists:
An IP address is automatically blacklisted by specialized IT security software algorithms when it is identified as being related to suspicious behavior, such as frequent failed login attempts. (IP-based)
IT security experts manually add certain IP addresses to the blacklist based on their judgment. (IP-based)
When a URL or webpage associated with an IP address is considered unsafe due to suspicious keywords, geographic location tags, etc., the corresponding security software or administrators will blacklist the IP. (Domain-based)
If an IP address or its associated domain is notorious for past involvement in hacking or other suspicious activities, it might be automatically or manually added to the blacklist. (Both)
Why Would an IP Address Be Blacklisted?
Being added to an IP blacklist can result in a drastic drop in website traffic or even reduce it to zero, and emails sent to customers could fail to be delivered. Such a situation can be disastrous for businesses, severely affecting daily operations and communication with clients.
So why might an IP address end up on a blacklist?
IP addresses are typically blacklisted to protect network security, a decision made by cybersecurity monitoring systems or IT administrators who believe certain IPs may pose security risks after analysis. These IPs might be marked as suspicious because they have genuinely been involved in malicious activities, or due to false positives, mistakenly identifying them as threats. There are also cases of false negatives, where genuinely dangerous IPs are not correctly identified.
One common cause of false positives is the misuse of proxy servers. Proxy servers act as gateways between devices connecting to the internet and the websites they access, capable of hiding a user's actual IP address and often used for legitimate privacy protection. However, when exploited by attackers, proxies can deceive the servers of target websites. For instance, attackers from regions with high online crime rates might use mobile proxies to masquerade as legitimate users from low-risk areas to avoid suspicion.
Whether due to actual malicious behavior or a false positive, an IP address is usually blacklisted based on specific criteria, and only those that meet these standards are added to the list.
These scenarios include, but are not limited to:
IT administrators identifying certain IP addresses associated with known malicious entities, especially after reports of malicious activity.
IP scanning tools detecting IPs linked with suspicious factors, such as being from a geographic location notorious for cybercrime or web page content related to spam keywords.
IP addresses associated with user behavior that violates terms of service, such as breaking the rules of the website being used.
These highlight three core reasons for IP blacklisting: association with bad reputation, involvement in suspicious activities, and breaches of certain legal regulations.
Security monitoring systems are not infallible and can sometimes mistakenly classify privacy-conscious legitimate users as risky ones. If your IP address has been wrongly blacklisted due to using a VPN or proxy server, you have the right to appeal.
How to Check if Your IP is Blacklisted
If you're now wondering whether your IP address has been blacklisted and are eager to confirm, hold on. Before we delve into how to check, let's first discuss the signs that your IP address might be blacklisted, so you can perform a preliminary self-check.
Signs Your IP Address May Be Blacklisted
When an IP address is blacklisted, users will encounter a series of issues that directly or indirectly indicate the presence of a blacklist.
The most direct sign might be an inability to access certain web pages, with the browser displaying an "unable to access this site" message. Other signs that your IP may have been blacklisted include:
- Unusually slow network connections, with pages loading at speeds well below normal levels.
You can use BrowserScan's Internet speed test tool to understand your internet speed.
Frequent alerts from antivirus software about illegal or suspicious network activity.
A significant reduction in search engine page results.
Emails you send are repeatedly marked as spam or fail to be delivered altogether.
Note that consistently operating from an IP address that's on a blacklist could spread this distrust to your own domain and call into question the security of your website.
Check If You Are Blacklisted
Determining whether an IP address is blacklisted can be done through various means. This usually involves using online checking services, cybersecurity tools, or command-line utilities. If you encounter obstacles when sending emails or browsing web pages, you can also directly contact your email service provider or web hosting company, as they may have the means to check the status of your IP.
The specific steps you take will depend on your individual needs and preferences. For ordinary users who might have been mistakenly added to a blacklist, you can simply enter your IP address into an online blacklist lookup tool or contact your email service provider to verify. This method is quick and transparent.
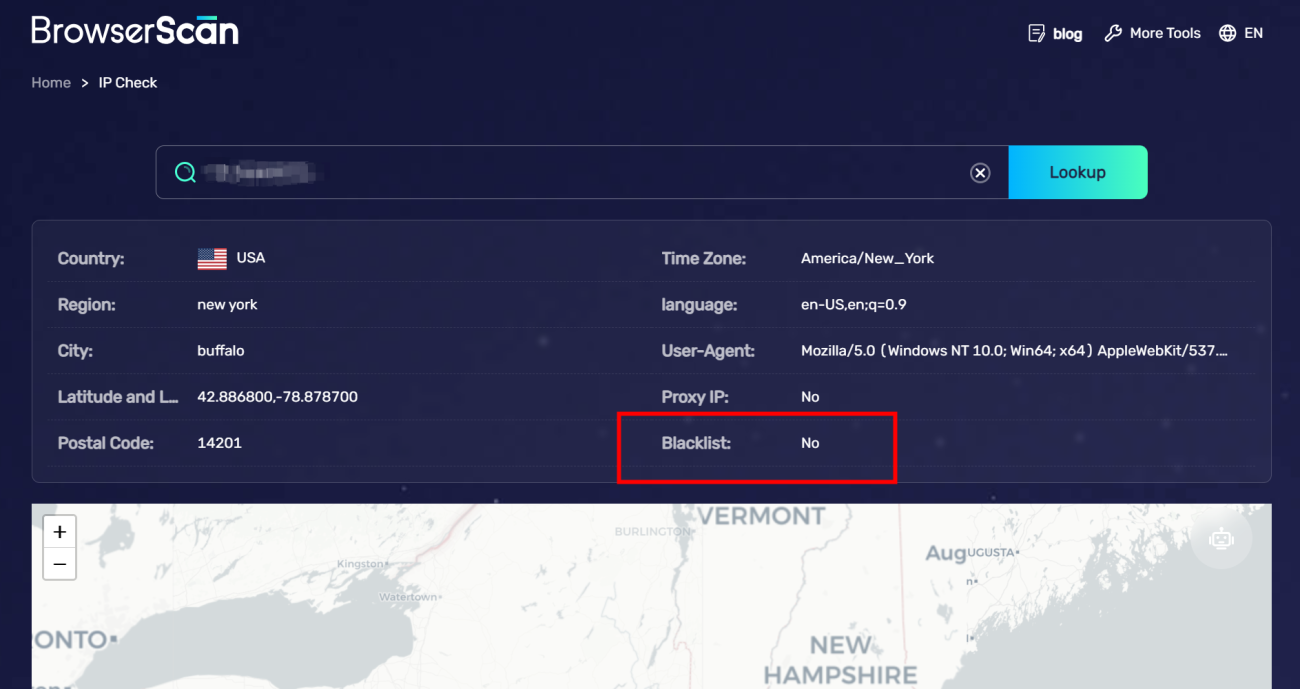
You can use BrowserScan's IP address lookup tool to check if you are blacklisted.
How to Get Your IP Address Off a Blacklist
Step 1. Confirm the Reason
Before requesting removal from a blacklist, you need to understand why you were added in the first place. This may involve providing evidence to the blacklist administrators that you have resolved the issue. If your IP address appears on multiple blacklists, it can severely affect your online reputation and may lead to longer-term bans or permanent blocks.
First, use a blacklist checking service to identify which blacklists include your information and the reasons for being blacklisted. Then, visit the websites of the relevant blacklists to look up your IP information.
Step 2. Fix the Issues
Upon discovering potential issues, you should immediately work with your IT team to resolve them or seek professional help. Additionally, you can take the following steps to revoke the blacklist:
Review the suggestions provided by the blacklist operators for resolving the issues.
Ensure that all senders using your domain to send emails follow best practices for email sending to avoid spam.
Check if someone has illegally taken control of your domain or is impersonating your IP address to engage in improper conduct.
If you're using a shared IP, contact your email service provider to find out if other users have caused a spam issue and ask how they can help you get unblocked.
Step 3. Submit a Request
After addressing the issues that led to the blacklisting and taking measures to fix them, you can submit a request to the relevant blacklist authorities to be delisted.
The process varies depending on the type of blacklist:
For self-service blacklists, like Spamhaus, you need to manually visit their website and submit a removal request. When filling out the form, be sure to politely explain the cause of the issue, the measures you have taken to resolve it, and the preventive steps you plan to take to avoid similar issues in the future.
For automatic blacklists, like Uceprotectl1, after following the same procedure, patiently wait for 1 to 2 weeks; they typically update their systems and remove your information automatically.
After you submit your request, the processing time will vary based on the operational processes of the blacklist organization. For automatic blacklists, it generally takes 1 to 2 weeks to process your request. For self-service blacklists, it may be faster, usually taking a few hours to a few days. If your IP has been blacklisted for major violations or has a poor reputation record, the removal process could take longer, up to 3 to 4 months.
Remember, once you are off the blacklist, be careful not to get listed again! Removing yourself from a blacklist a second time can be more challenging.
How To Prevent Being Blacklisted?
Prevention is always simpler and more effective than fixing a problem after it occurs. Here are several ways to prevent being blacklisted:
Protect Against DNS Hijacking
If your website is involved in malicious activities due to DNS hijacking, your domain could be blacklisted. According to data from 2023, 28% of surveyed organizations have suffered DNS hijacking. Therefore, establishing a robust cybersecurity system is crucial to protect your domain from blacklisting.
Check IP and Domain Reputation
It's vital to regularly check your blacklist status so you can act immediately if any issues arise.
Use Dedicated Email IP and Domain
Whether to choose dedicated or shared email IPs and domains requires a comprehensive assessment based on your situation.
For Email IPs:
Using a shared email IP can affect your reputation and email deliverability due to other users' behavior, but dedicated servers are more expensive. Consider a dedicated email IP if you:
Send more than 10,000 emails daily.
Have the human resources to manage a dedicated IP.
Can support the monthly cost of 2 to200 for a dedicated IP.
For a Domain:
A security incident on one domain in shared hosting can impact the performance and reputation of other domains on the same IP. Some hosting providers offer protection measures for shared IPs. Consider dedicated hosting if you:
Have the resources to manage a dedicated IP.
Receive up to 100,000 daily website visitors.
Manage resource-intensive applications such as databases, streaming, or gaming platforms.
Handle sensitive information and require the highest level of security protection.
Best Practices for Mass Emailing
While even the most careful individuals can sometimes be blacklisted, many behaviors leading to blacklisting can be avoided. Follow these ten best practices for mass emailing to reduce the risk of being blacklisted:
Set up or check email authentication settings in your DNS account, such as DMARC, DKIM, and SPF.
Collect email addresses using double opt-in to filter genuinely interested users.
Regularly update your mailing list, remove invalid emails upon hard bounces, and choose providers that automatically stop sending to hard bounce addresses.
Gradually scale up your mailing list size.
Provide an unsubscribe option to prevent recipients from marking unwanted emails as spam.
Avoid using trigger words that could activate spam filters.
Control the number of links in your emails.
Avoid adding links to potentially blacklisted websites and using link shortening services.
Segment your mailing list to send more relevant content and reduce spam complaints.
Choose a reputable email service provider.
Conclusion
While IP blacklists are a key component of cybersecurity, designed to prevent various online threats, false positives do occur. Facing the challenges posed by IP blacklists, it's crucial to understand the mechanisms behind them and their potential impact on individuals and businesses. Therefore, mastering how to detect if your IP address is blacklisted, how to address and resolve blacklisting issues, and how to prevent them, is essential knowledge for every internet user. You can use BrowserScan's IP address lookup tool to check if your IP is blacklisted, promptly avoid blacklisting issues, and maintain smooth online communication and a good reputation for your business.