

What is Proxy Helper?
Google Chrome typically relies on system-wide proxy settings. However, "Proxy Helper" is a Chrome extension that provides the flexibility to define proxy settings specifically for the Chrome browser, independent of other system settings. This tool is ideal for users who need to apply different proxy rules exclusively within their browsing environment.
Proxy Helper Features
support socks4, socks5, http, https, quic proxy settings
support pac script
support bypass list
support customer rules
support authentication
support extension settings synchronize
How to Set up Proxy Helper in Chrome
Step 1: Install Proxy Helper
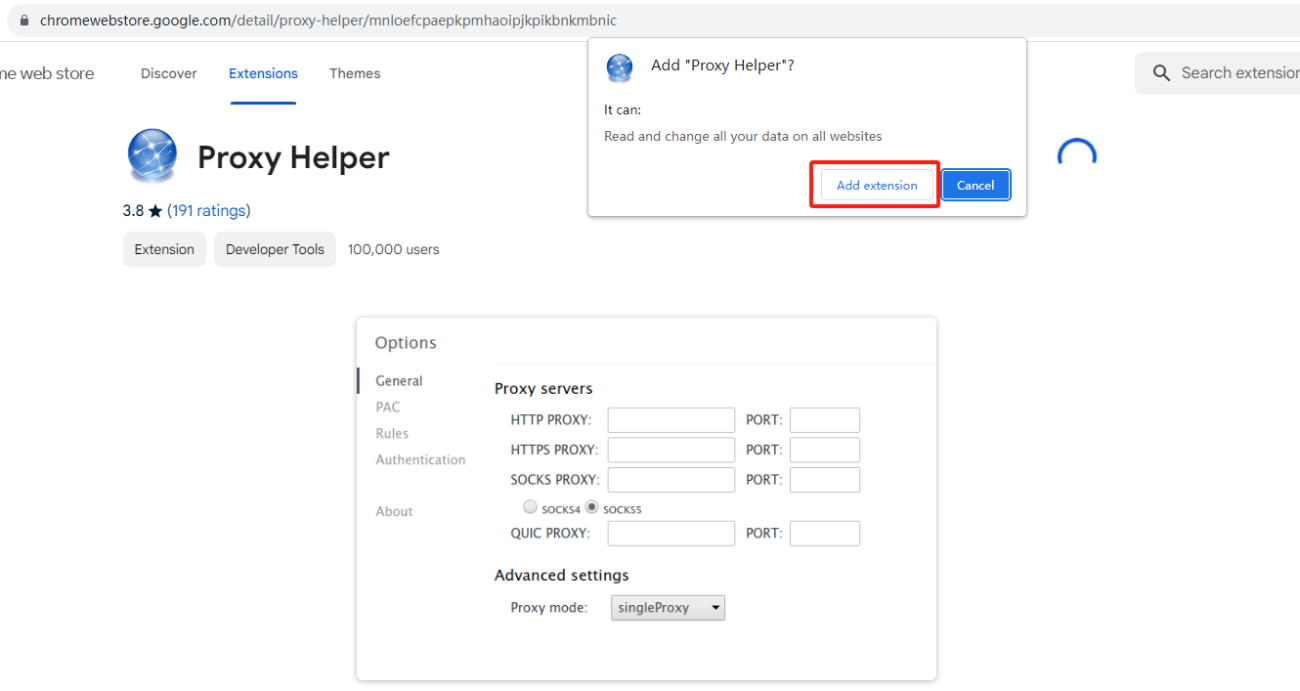
Go to the Chrome Web Store: Proxy Helper Extension.
Click 'Add to Chrome' for "Proxy Helper."
When asked, click 'Add Extension.'
Step 2: Configure the Proxy Settings
Click on the "Proxy Helper" icon in Chrome's extension area.
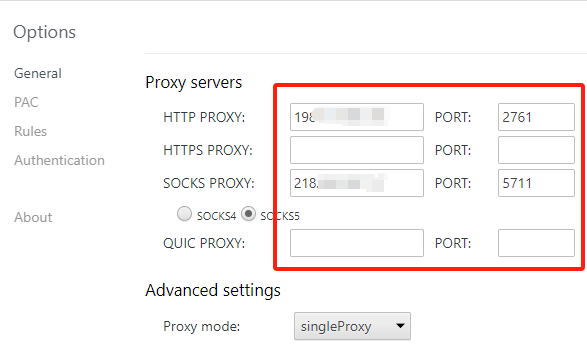
Select the type of proxy protocol you need: HTTP, HTTPS, SOCKS4, or SOCKS5.
Fill in the 'Proxy Host' and 'Proxy Port' fields with your proxy server's information.
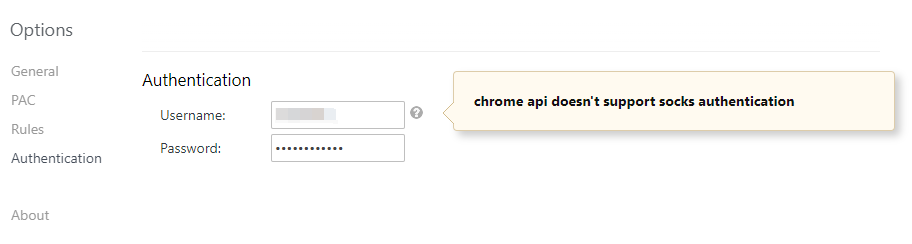
If your proxy requires a username and password, go to the 'Authentication' section and enter your 'Username' and 'Password'.
Chrome API doesn't support SOCKS authentication, meaning it cannot log in to proxies that require a username and password.
For example, if you're trying to connect to a SOCKS5 proxy with the IP address 203.115.167.79 that needs login credentials, Chrome won't be able to use this proxy because it can't provide the necessary authentication details.
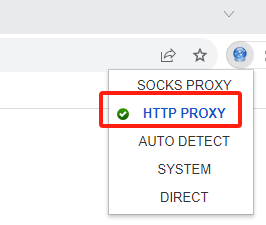
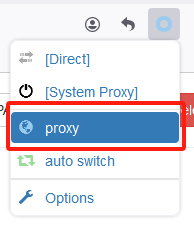
Step 3: Selecting the Proxy
- Click the "Proxy Helper" icon and choose "HTTP PROXY" for HTTP proxies or "SOCKS PROXY" for non-authenticated SOCKS proxies.
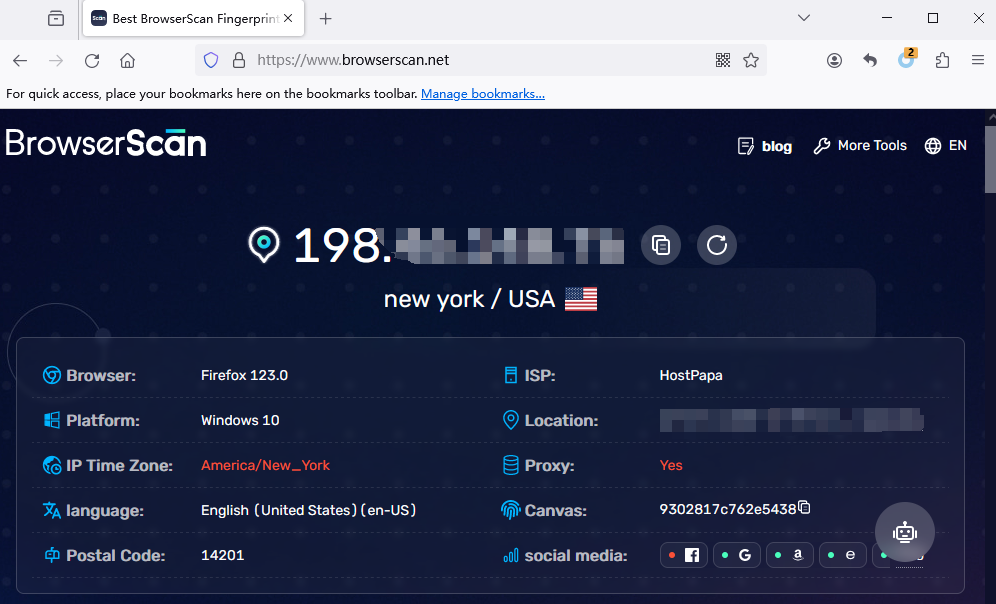
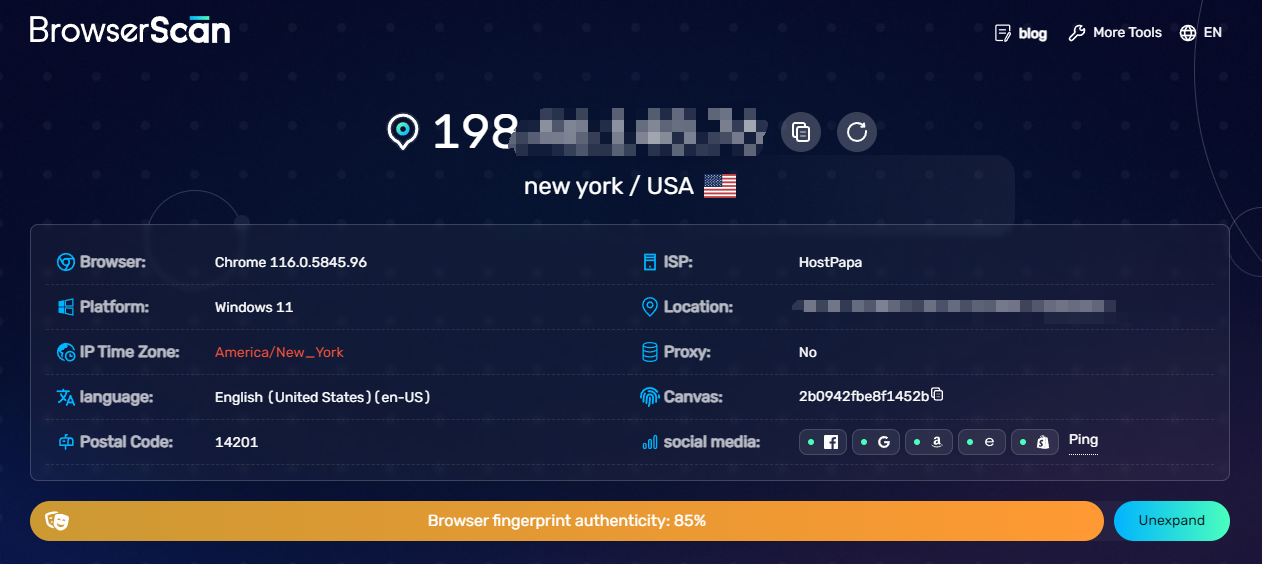
Verify Proxy Success with BrowserScan
To check if your proxy is working, you can use BrowserScan to view your IP address. BrowserScan will show you if your IP has changed, indicating that the proxy is active.
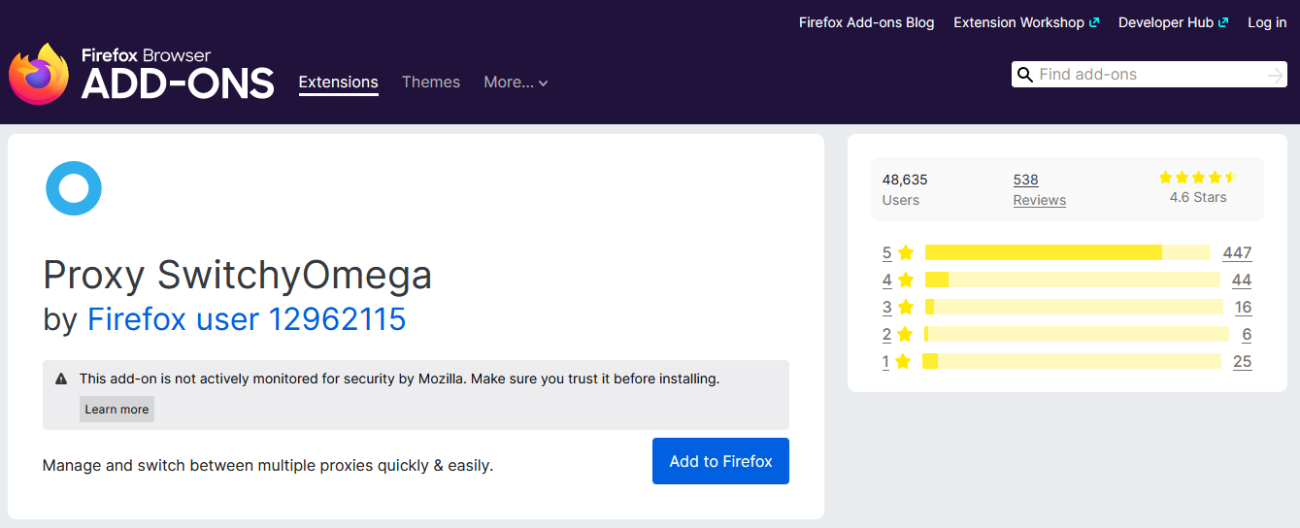
How to Set up Proxy Helper in Firefox
The Proxy Helper extension isn't available for Firefox, but a similar add-on with the same functionality can be found in the Firefox Add-ons marketplace.
Step 1: Install Proxy SwitchyOmega
- Using the Firefox browser, download and install the Proxy SwitchyOmega add-on.
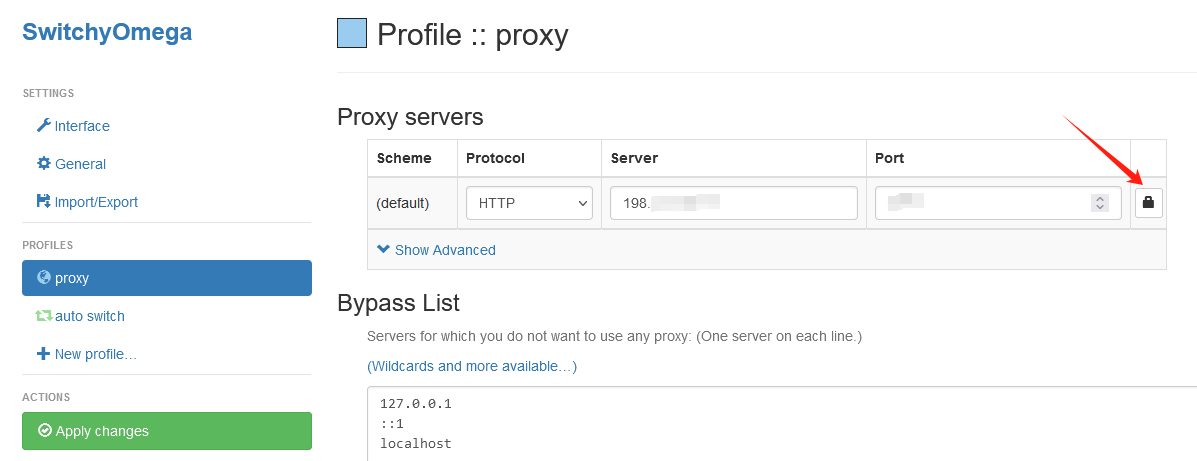
Step 2: Configure the Proxy Settings
Configure the proxy server details in Switchy Omega by selecting the proxy protocol and entering the proxy host, port, username, and password.
Click the "lock" icon to enter the username and password for your proxy. And don't forget click "Save changes" button.
After entering the proxy information, click the "Apply Changes" button.
Firefox supports SOCKS5 proxies with authentication, allowing you to use password-protected SOCKS5 proxy servers within the browser.
Step 3: Configure the Proxy Settings
- Click the SwitchyOmega icon, then choose the "proxy" profile to activate your configured proxy settings for web access.
Verify Proxy Success with BrowserScan
To check if your proxy is working, you can use BrowserScan to view your IP address. BrowserScan will show you if your IP has changed, indicating that the proxy is active.